Course 02 · Lesson 8 of 8 · Setting up a good start
Bringing a tree home
A new tree's first weeks set up everything that follows. Learn to make an arrival record, inspect for problems without guessing past the evidence, plan from where the tree grew and what the weather is doing, and sort the first jobs into act now, find out more, and hold off.
The question
What should you do in a new tree's first hour, first week, and first month?
By the end of this lesson, you will be able to:
- Make an arrival record and inspect a new tree for problems, recording signs without diagnosing beyond the evidence.
- Choose a new tree's first actions from its condition, where it grew, and the weather, separating what to do now, what to find out, and what to defer.
- Plan follow-up checks for a new tree's first day, week, and month.
About 16 minutes to read and explore
The gift juniper, the instructional example that has run through this course, arrives on December 20, bought at a supermarket in mid-December. Its tag reads “INDOOR BONSAI · Juniper · Water twice a week · Bright indirect light · Keep away from drafts · Easy care.” Its new owner sets it on the warm windowsill above the radiator in the west balcony apartment and starts a list: water it twice a week, buy proper bonsai soil, and maybe some fertilizer to help it settle in.
You know by now that the tag is unreliable (Lesson 2), that this tree belongs outdoors (Lesson 3), and that its pot has no drainage hole and a surface glued shut (Lesson 7). That still does not say what to do first. Hard frosts are forecast, the root zone may be sitting in water, and nobody has confirmed what the tree is. Some of this cannot wait a day; some would be made worse by hurrying. This lesson puts the whole course in order for a new tree: the first hour, the first week, and the first month.
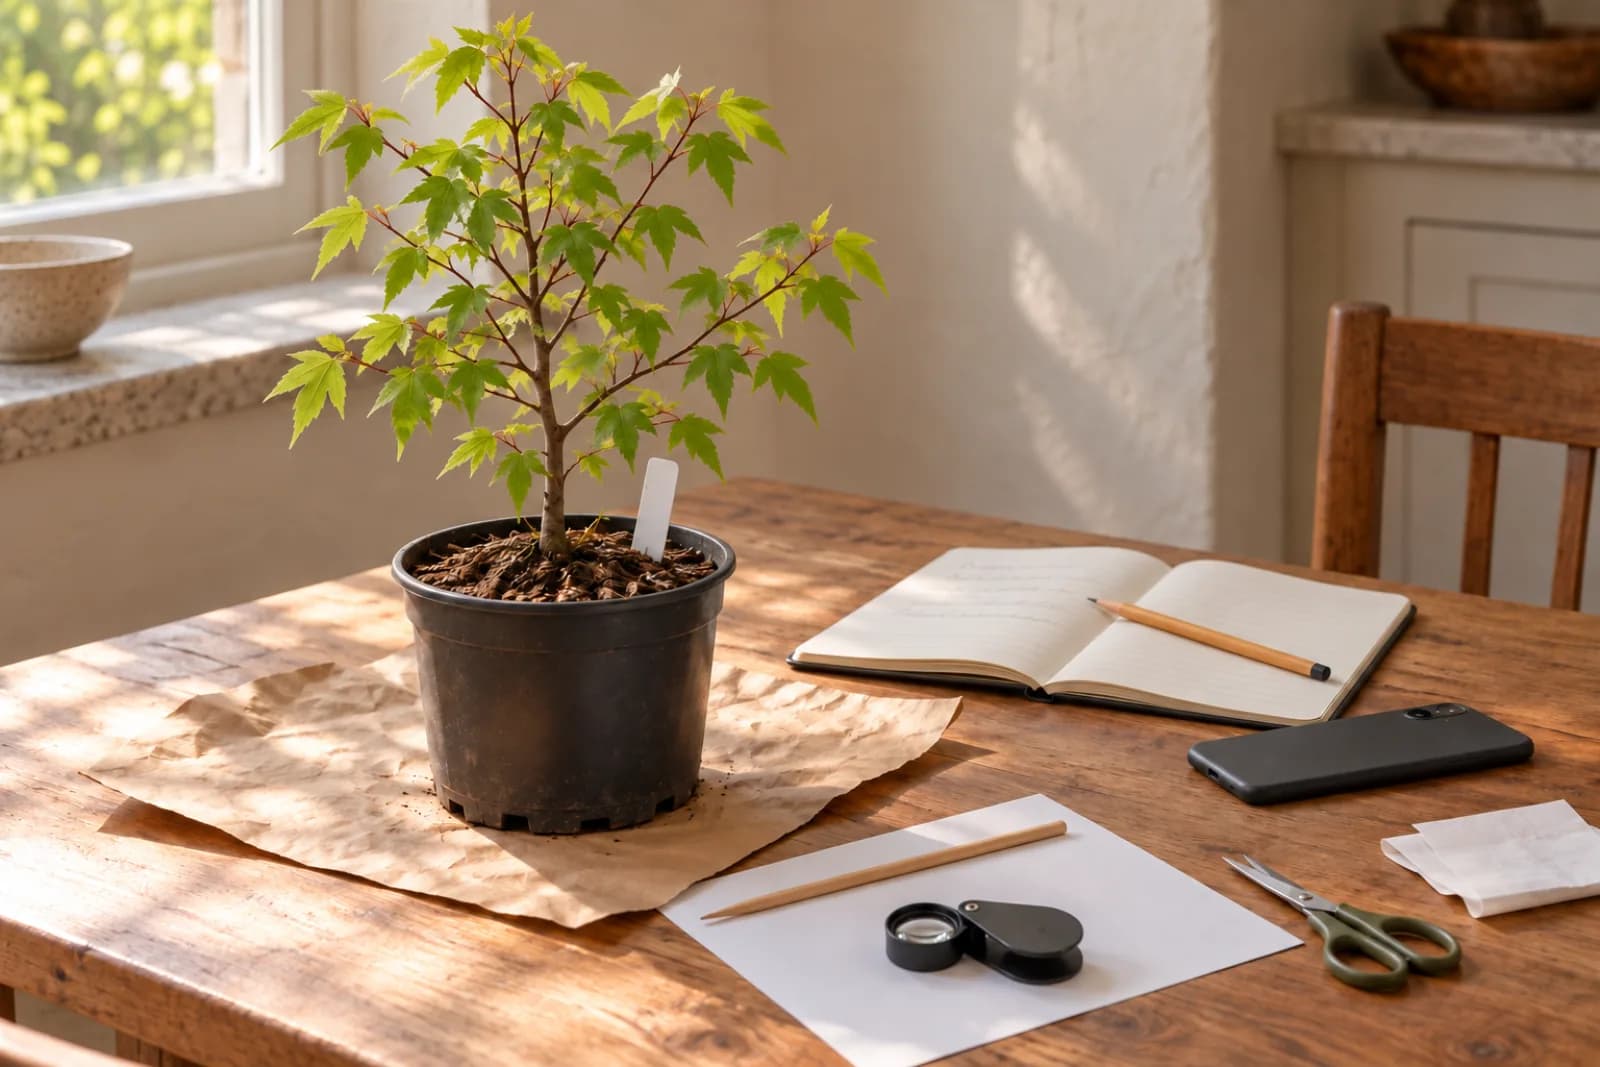
A move is already a stress
Even a healthy tree arrives under some stressAny condition that pushes a tree's functioning outside its normal range and limits growth or survival, such as drought, waterlogging, heat, cold, poor light, root loss, pests, or heavy pruning. Several stresses at once can add up to more than the tree can support.Open the glossary. It grew used to one kind of light, temperature, humidity, and watering; the trip home may have meant a cold car or days in a dark box; and now all of that changes at once. Course 01, Lesson 14 showed that stresses add up, so the first weeks have a simple aim: remove the stresses you can, add none you can avoid, and learn what you have. Every choice in this lesson is one of three kinds of move:
- Act now on what gets worse by the hour or the day: a root zone sitting in water or bone dry, frost or a heat wave tonight, a tie cutting into the bark, a pest you can pick off.
- Find out more about what is still unknown: what the tree is, how it was grown, what a sign on a leaf means, whether pests show up on a second look.
- Hold off on elective work (repotting and root work, pruning, wiring and styling, and fertilizing) until the tree has settled and you know what it is.
A good arrival plan uses all three. Acting on everything stacks stress on a tree that has just moved; holding off on everything leaves standing water and frost free to do their damage.
Start an arrival record
Before you change anything, write down what you have. An arrival recordA dated note made the day a tree arrives: where it came from and how it was grown, the price, its tag or label copied word for word, its identity and how sure you are, what an inspection found, and photos from every side with close-ups. It is the baseline that later checks are compared against, and it helps anyone asked to identify the tree or explain a later problem.Open the glossary is a dated note made the day a tree arrives; a notebook page or a phone note with photos is enough. Record:
- the date, the source, and the price, with the receipt or nursery label;
- the tag or label, copied word for word, since even a wrong tag is a clue;
- its identity and how sure you are, such as “probably Juniperus procumbens ‘Nana’, not confirmed,” and whom you asked (Lesson 2);
- where and how it was grown, its provenanceWhere a plant came from and how it was grown: the nursery or source, its climate, and whether it grew outdoors, in a heated greenhouse, or abroad. It hints at how ready a tree is for your conditions and how carefully to acclimate it after you buy it.Open the glossary (Lesson 6), asked while you are still at the till;
- what is already in or on it, such as fertilizer pellets, wire, ties, or a cane;
- what the inspection finds, including “nothing found.”
Then photograph it before anything changes: the front, back, and both sides from the same height, plus close-ups of the foliage (tops and undersides), the trunk base, the surface, and the pot's underside.
The record is the baseline for every later check. vigorA tree's observed growth performance relative to its expected seasonal behavior, meaning what a tree of its kind should be doing at that point in the season. It is judged from shoot extension, bud development, foliage condition, and root activity when visible, across several observations over time, not from one large leaf or green color. A vigorous tree is growing at or above that expected pace.Open the glossary is judged against the tree's own normal over time (Course 01, Lesson 14), and this tree's normal starts today. The record also gives anyone helping to identify the tree what they need, and if something goes wrong in a month, it shows whether the problem was there on day one (Course 07, Tree Health and Diagnosis).
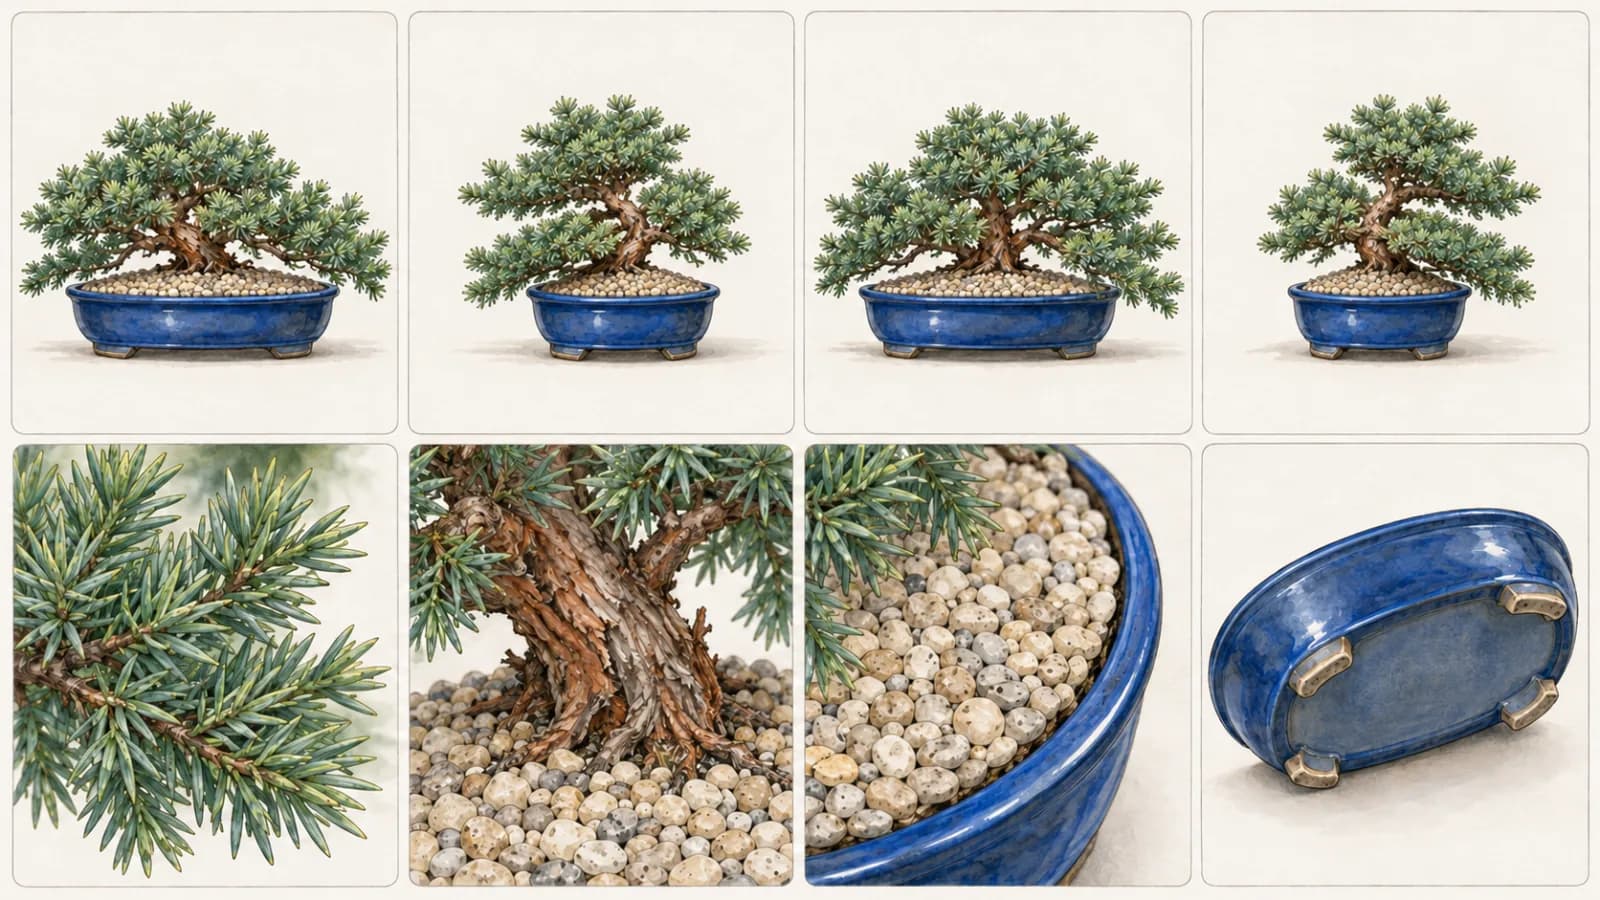
Inspect before you change anything
A first inspection takes ten or twenty minutes, in good light, with a hand lens if you have one, a sheet of white paper, and a wooden chopstick (Lesson 7). Work from the top down, then the pot, then underneath it. The aim is to see and record, not to diagnose: a sign tells you where to look next, not what is wrong.
Foliage, shoots, and stems
Compare the foliage's color and density with what that kind of tree normally does in that season. A trident maple in mid-April should be opening fresh leaves. A juniper makes no new growth in winter, and many junipers turn bronze or purplish in the cold, a normal winter color (Course 01, Lesson 13). Note any brown or yellow foliage, and where it is, without deciding yet what it means. Treat green as a weak sign: a coniferA tree or shrub that bears seeds in cones, which are berrylike in junipers, instead of in flowers and fruits, and usually has needle-like or scale-like leaves. Most conifers are evergreen, but larches and a few others drop their needles each autumn.Open the glossary can stay green for weeks after its roots begin to fail (Course 01, Lesson 14), so good-looking foliage goes in the record as “healthy so far.”
Then check the stems for a bamboo cane, plastic ties, a wired-on label, or a twist of wire. Anything already pressing into the bark comes off today. A tie cannot stretch as the trunk thickens through the growing season, so within weeks it cuts deeper, crushing the living layers under the bark and, if it rings the trunk, girdlingDamage that removes or crushes a complete ring of bark around a trunk, branch, or root, severing the phloem all the way around. Sugars from the leaf side can no longer pass, so tissues on the root side lose that supply; a fully girdled trunk usually kills the tree over time.Open the glossary it (Course 01, Lesson 3). Snip it rather than pulling it, so the bark does not tear.
Pests and where they hide
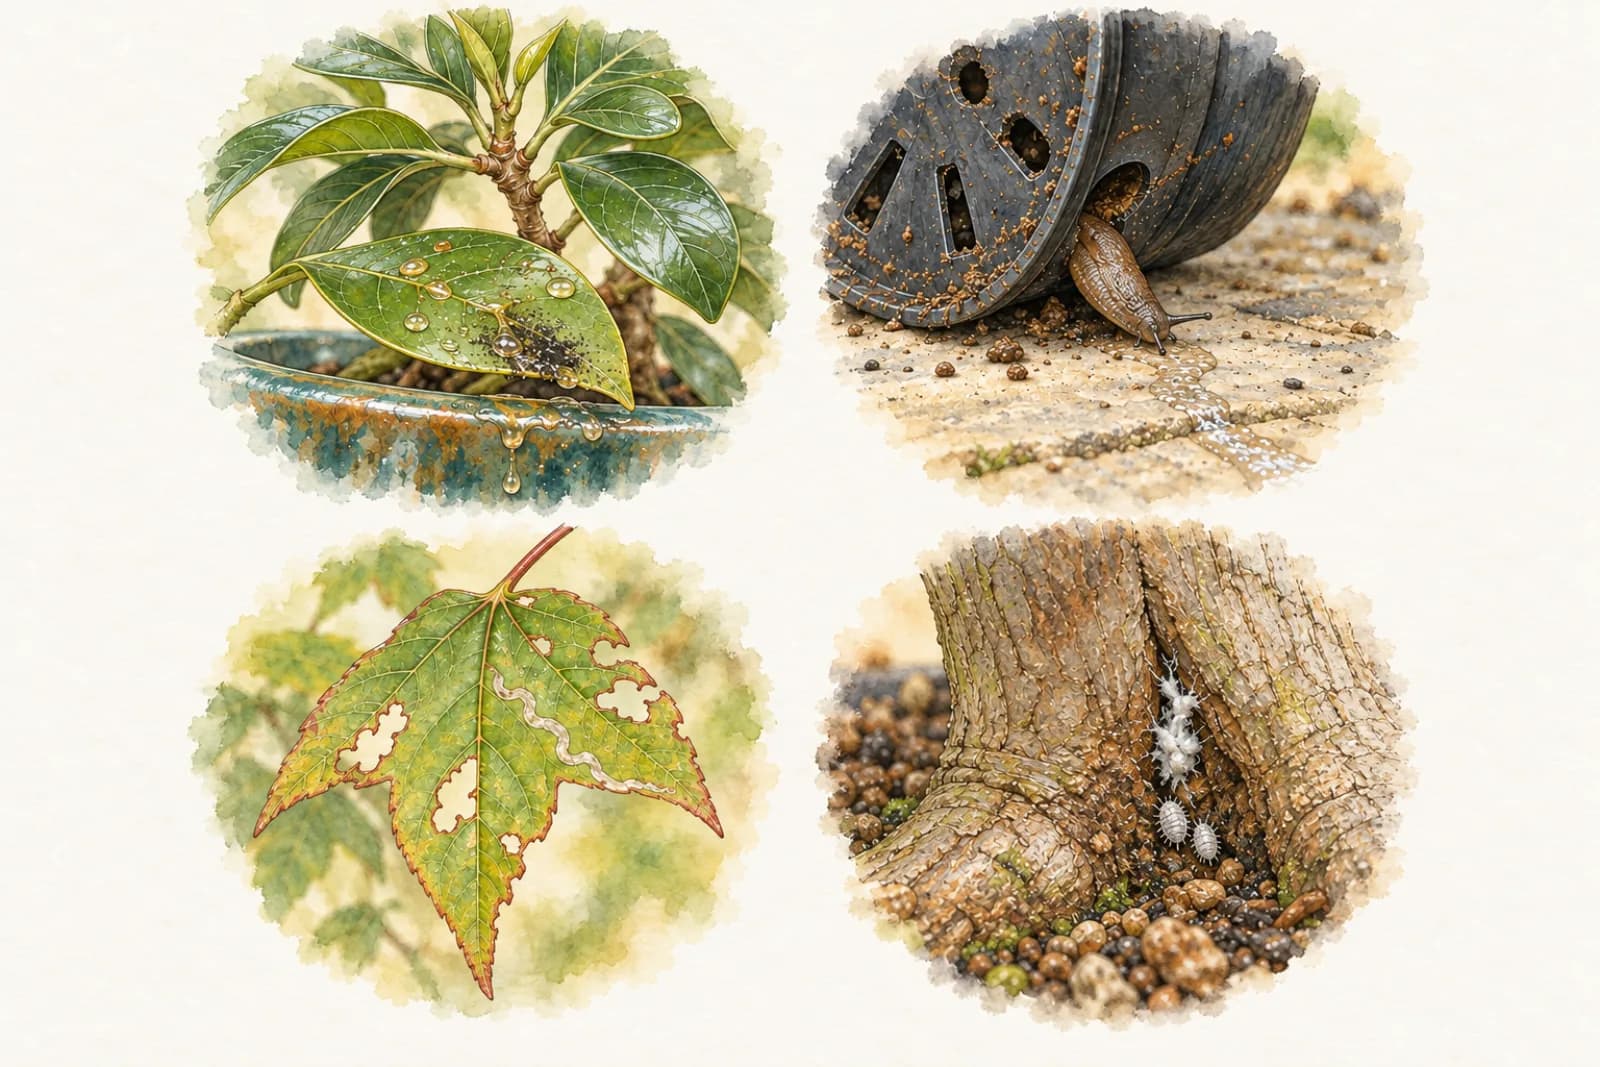
Look where pests hide: leaf undersides along the veins, leaf axils and soft shoot tips, inside juniper foliage tufts, bark crevices, the trunk base, and under the pot's rim and the pot itself. The signs are the ones Lesson 6 used at the sales bench: fine webbing with speckled foliage (typical of spider mites), sticky, shiny patches of honeydewA sticky, sugary liquid left on leaves and stems, and on surfaces below them, by insects that feed on phloem sap, such as soft scale insects, mealybugs, aphids, and whiteflies. Shiny, sticky patches are a sign to look closely for the insects nearby, not a diagnosis of which one it is, and black sooty mold often grows on honeydew left in place.Open the glossary, small brown bumps that do not brush off (scale insects), white cottony patches (mealybugs), and clusters of small, soft insects on shoot tips (aphids). Repeat the tap test over white paper, too: debris lies still, and mites crawl. At home, with time to look underneath, add two checks:
- Below the leaves. Honeydew is a sugary liquid left by sap-feeding insects such as scale insects, mealybugs, and aphids, and it drips, so sticky patches often show first on lower leaves, the surface, or the pot rim. Look for the insects on the shoots above. Left in place, honeydew can grow a black film of sooty mold.
- Under the pot. Ragged leaves and silvery slime trails are typical of slugs and snails, which often hide under the pot by day.
Every sign here is “typical of” a pest, not proof of one. Honeydew shows that something is feeding on sap, not which insect. Record what you see, photograph it, and remove what you safely can by hand, such as a slug; confirming a pest and choosing a treatment belong to Course 07, Tree Health and Diagnosis. Spraying “just in case” tells you nothing and adds stress, and spraying before you know the pest risks using the wrong product.
Practice check · not scored
Surface, pot, and drainage
Next, the container. Is the surface open mix that you can see and test, or sealed under glued stones that shed water and hide the root zone? Note weeds (pull them gently), moss, and any small round fertilizer pellets, which are slow-release fertilizer from the grower and matter before anyone thinks of feeding. Then lift or tilt the pot and look underneath. Is there a drainage hole at all? White root tipThe growing end of a root, made up of the root cap, the dividing cells behind it, and short zones where new cells lengthen and mature. Active tips are usually pale or white and show where a root is extending into fresh substrate.Open the glossary at the holes are a good sign of growing roots (Course 01, Lesson 2). If the pot sits inside a decorative outer pot, lift it out and look for standing water.
Glued stones, a pot with no hole, and an outer pot holding water are the three common problems, and Lesson 7 covers the proportionate fix for each, including slip-pottingMoving a plant's root ball, whole, into a slightly larger container and filling only the gap around it with fresh substrate, without loosening, washing, or cutting the roots. Because the roots are barely disturbed, it can fix a pot that does not drain outside the usual repotting season.Open the glossary, which moves the whole root ball, undisturbed, into a pot that drains. Today's job is to find out which you have, because a root zone that stays waterlogged needs fixing within days, not months (Course 01, Lesson 7).
The root zone
Check the moisture where the roots are. Lift the pot: heavy for its size means wet, and light means dry. Push a wooden chopstick deep into the root zone, partway between trunk and rim, and leave it a few minutes; wood that comes out dark, cool, and damp has found moisture (Course 01, Lesson 2). Tilt a pot with no hole over a sink: water that trickles out was standing in the bottom. And smell the surface. Earthy is normal; sour or rotten suggests roots short of air, which makes a drainage fix more urgent.
Then the check, not the tag, decides the watering. If the root zone is dry, water slowly until water runs from the holes, then let it drain. If it is wet, add nothing and check again tomorrow. Course 03, Watering and Daily Observation, turns this into a routine.
Predict first
In the roots, out of sight. With no drainage hole, each watering adds to the water standing in the bottom of the pot, so the lowest roots stay saturatedDescribes soil or substrate whose pore spaces are completely filled with water, leaving little or no air. Brief saturation right after watering is normal in a pot that drains; saturation that lasts starves roots of oxygen.Open the glossary and short of oxygen, and within days their tips can stop growing and begin to die back (Course 01, Lesson 7). Meanwhile the warm, fairly dim room denies the juniper its winter rest. Because its foliage can stay green for weeks after its roots begin to fail, the first visible signs might come a month or more later, when the damage below is well advanced. That is why the first hour looks at the root zone and the placement, not only at the foliage.
Keep a new tree apart for a few weeks
One clean inspection does not prove that a tree is clean. Spider mites and young scale insects can be too few or too small to see on day one, their eggs are smaller still, and in a warm room a few can become many within a week or two. So growers practice quarantineKeeping a newly arrived plant apart from your other plants for a few weeks, where practical, while you check it again for pests. Pests too small or too few to see on arrival have time to show before they can spread, and the plant joins the others only after several clean checks, not after a set number of days.Open the glossary: keeping a new arrival apart from their other plants for a few weeks, where practical, while they look again.
Apart need not mean far: another room, the other end of the balcony, or a few steps from the bench, so that foliage does not touch. Handle the new tree last, and rinse your hands and tools afterward. Repeat the hand lens and tap test every few days, then weekly. The tree joins the others after several clean checks, not a set number of days; a pest found in week three restarts the count. In a one-window apartment, a few steps of distance and closer checks still help.
Plan from where it grew
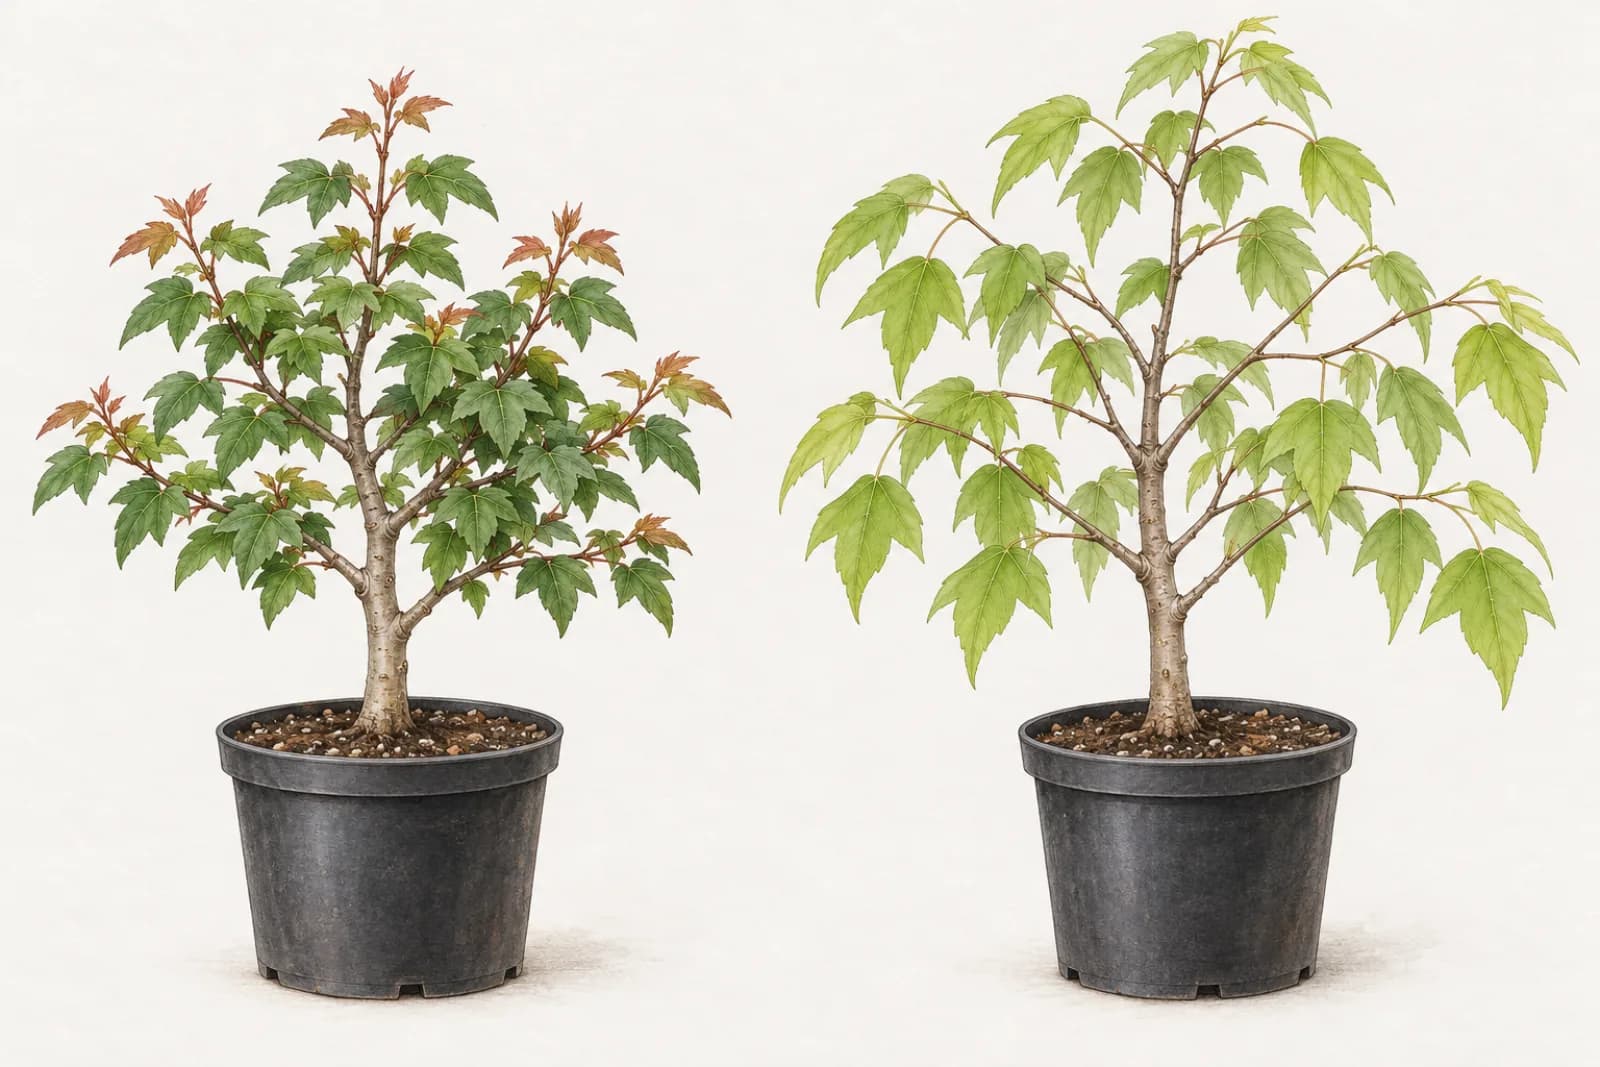
Where a tree spent the last few months matters as much as what it is, because its leaves and its cold readiness were built there. Ask the seller, and plan from the answer:
- Outdoors in the open at a local nursery: it is used to your sun, wind, and spring weather, so it needs no slow step-up into the light. Its newest leaves are still soft, though, and a late frost can damage them. (If it grew under shade cloth instead, step it up into full sun as you would a greenhouse tree.)
- A heated greenhouse or a warm shop: its leaves grew in gentle light and still air, and it has built little or no cold acclimationThe gradual process, triggered by shortening days and falling temperatures, in which a tree's tissues become able to survive freezing. A tree moved suddenly from a warm room into frost has not acclimated and can be badly damaged. It is not the same as shoots hardening, or turning woody, though the two often happen around the same time.Open the glossary. A temperateDescribes regions with distinct warm and cold seasons, and the trees adapted to them, which typically need a cool winter rest. Trident maples and the junipers commonly grown as bonsai are temperate trees and need seasonal outdoor conditions rather than a warm room all year.Open the glossary tree from here moves outdoors gradually, bright shade first and more sun over one to two weeks or more, with shelter on frost nights (Lesson 3). For a tropicalDescribes warm regions near the equator without a cold winter, and the trees adapted to them. Tropical trees such as ficus have no chilling requirement and can be damaged or killed by frost; their growth slows when light or warmth drops.Open the glossary tree such as the ficus, any window is a step down from the greenhouse, so it gets the brightest spot you have, and a few leaves may yellow and drop as it adjusts.
- A box in the mail: after days in the dark, unpack it at once, check the root zone, and give it a few days of bright shade before full sun.
- Unknown, like the gift juniper: assume it has been kept warm for weeks and has no cold readiness, even if it grew outdoors before that.
Practice check · not scored
Check the weather before you place it
Then check the forecast for tonight and the next few days:
- Frost, for a tree in soft new leaf or one that has been living warm: a night under a roof in a cool place that stays above freezing, such as an unheated garage or shed on a night of light frost, and back out in the morning; not weeks in a warm house, and not a frost pocketA low spot where cold air collects on clear, still nights, because cold air is denser than warm air and drains downhill as water would. Frost comes earlier in autumn, later in spring, and harder there than in spots a little higher up.Open the glossary, a low spot where cold air pools on still, clear nights (Lesson 5).
- Winter, for a temperate tree from a warm room or shop, like the gift juniper: neither hard frost nor the warm room for the season, but a cool, bright, frost-free room first, then outdoors in steps as the weather allows, with its roots protected from hard freezes (Course 06, Seasonal Care and Timing).
- A heat wave: bright shade for the first few days, the pot shaded, and moisture checks morning and afternoon (Lesson 5).
- Strong wind: a sheltered spot and a secured pot, since a tall tree in a light nursery pot topples easily.
These cases are in the Northern Hemisphere, in the course's example climate, where the last spring frost usually comes in late April, the first autumn frost in mid-October, and south-facing windows get the most sun. In the Southern Hemisphere, swap north and south, and shift the months by half a year.
First actions: fix what cannot wait
Put it all together, and the first actions are usually a short list:
- Water only if the root zone needs it, thoroughly, and let it drain.
- Fix drainage: tip out standing water, empty an outer pot, and within days slip-pot a tree out of a pot with no hole (Lesson 7).
- Remove anything cutting in, such as a tie or a wire label loop.
- Remove what you can by hand, such as a slug, and pull weeds.
- Place it for where it grew and for the weather, apart from your other plants.
Everything else waits until the tree has settled and you know what it is. A pot that drains is not urgent, whatever mix it holds, and repotting is root work for the right stage and a deliberate plan (Course 11, Repotting and Root Development); slip-potting out of a pot with no hole is a smaller job, done now because the drainage cannot wait. Pruning, wiring, and styling need a tree that is growing well (Courses 08 to 10). And fertilizing, the most tempting of all, does not help a tree settle.
Checks for the first day, week, and month
Before you walk away, write the next checks into the record:
- Tomorrow: a chopstick check, and a look at the foliage in its new spot. A new place dries a pot at a new rate.
- In about a week: the forecast and any move it calls for, any tie mark or wound, and the leaves, for scorch or frost damage after the change.
- Over the first few weeks: the hand lens and tap test, every few days and then weekly, until several clean checks let it join your other plants.
- In about a month: signs that it has settled. Growth that looks normal for its kind and the season (in winter, foliage holding its color), and a root zone that dries steadily, rather than staying wet for days or drying out in hours.
If you will be away, show your helper the chopstick check, so they water by the root zone, not by the calendar.
Practice check · not scored
Worked example: the gift juniper on December 20
On December 20, the gift juniper's owner works through the checks and finds:
- Record: a supermarket, mid-December, growing history unknown; the tag copied; probably Juniperus procumbens ‘Nana’, not confirmed; the full photo set.
- Foliage and stems: evenly green, no new growth (normal in winter), no ties.
- Surface, pot, and root zone: a glued crust over a pot with no hole. The pot is heavy, a chopstick pushed through the gap at the rim comes out wet along its whole length, and water trickles out when the pot is tipped over the sink. The smell is earthy.
- Pests: none found with the hand lens or the tap test. Two houseplants live in the living room.
- Weather and places: hard frosts for several nights, down to about −9 °C (16 °F), then a milder spell after Christmas, for a tree that is not cold-acclimated. Besides the warm sill, there is a cool bedroom with a bright window and its radiator off, and the west balcony.
Sorted into the three kinds of move, the first-week plan reads:
Act now
- Move it to the cool, bright bedroom, away from the houseplants.
- Tip out the standing water, and add no more until the chopstick comes out only slightly damp.
- Within a few days, slip the root ball, undisturbed, into a slightly larger pot with drainage holes, then soak off the crust in pieces once the new pot can drain (Lesson 7).
Find out more
- Its identity: ask the giver which shop it came from, ask the shop for the botanical name, and show the photos to a nursery, an extension service, or a local bonsai club.
- Whether pests turn up on a second and third look.
- When the milder spell arrives, for its first steps outdoors.
Hold off
- Repotting into bonsai substrate and any root work (Course 11), pruning, wiring, and styling (Courses 08 to 10), and fertilizing (Course 05).
Check again
- Tomorrow: the chopstick, and the foliage in the cool room.
- In a week: the forecast, to start moving it outdoors in steps during the milder spell.
- Over the first few weeks: the hand lens and tap test, every few days and then weekly.
- In a month: foliage color holding, and a root zone that dries between waterings.
The owner is away for a week of work travel in January, so before the trip they show the friend who will water how to use the chopstick. Each line of the plan answers something the owner found, and each will change as the checks come in.
Three arrivals, step by step
The first hour with a new tree walks three arrivals through the same eight checks. Under New arrival, the Gift juniper comes first and follows the worked example, so use it to check yourself. Then try the Trident maple (Outdoor nursery, mid-April), at the small backyard, and the Ficus (Greenhouse shop, October), at the bright window.
At each step, read What you find and answer the question. A right answer is tagged Act now, Find out more, or Hold off; Reconsider explains what an answer missed, and you can change it. When all eight steps are answered, the Arrival record sets Your choices beside the course's recommended first-week plan and its Next checks. Before each tree, guess which steps will be Act now and which Hold off.
Exercise
The first hour with a new tree
New arrival · Instructional example
Gift juniper, December 20
Probably Juniperus procumbens 'Nana', not confirmed
A small juniper bought from a supermarket in mid-December as a gift. It sits on a warm windowsill above a radiator in the west balcony apartment.
0 of 8 answered
Step 1Record
Write down where it came from, copy the tag, and photograph it before anything changes.
What you find
- Tag. “INDOOR BONSAI · Juniper · Water twice a week · Bright indirect light · Keep away from drafts · Easy care”
- Source. A supermarket, in mid-December. Nobody knows where or how it was grown before the shop.
- Photos. Taken today from the front, back, and both sides, with close-ups of the foliage, trunk base, surface, and the pot's underside.
- Identity. The foliage looks like Juniperus procumbens 'Nana', a compact Japanese garden juniper, but nobody has confirmed it.
Arrival record
Answer all eight steps to fill in the record for the gift juniper. 0 of 8 answered so far.
Text description
Three instructional-example trees arriving at the course's growing places, each checked in the same eight steps: record, foliage and stems, surface, pot, and drainage, root-zone moisture, pests and keeping it apart, weather and placement, first actions, and when to check again. Each step lists what the owner finds and asks one question with three answers. Feedback explains every answer, and right answers are labeled as acting now, finding out more, or holding off.
The pictures: the gift juniper is a low, spreading juniper with dense, prickly blue-green foliage in a glazed blue pot, its surface covered with glued pebbles and a shop tag, on a windowsill above a radiator, with a frosty city view through the window. The trident maple is a young tree with soft, pale, three-lobed new leaves, tied to a bamboo cane, in a black nursery pot with weeds and moss on the surface, standing on a backyard patio beside the brick house wall on a clear evening, with the fence, the garage, a slug under the pot, and the moon rising. The ficus has a swollen pale trunk base and glossy dark oval leaves, a few of them shiny, in a cream glazed outer pot on a deep, sunny sill, with a pothos at the far end. At each inspection step a magnified view shows the detail being checked.
Gift juniper, December 20 (Juniperus procumbens 'Nana', not confirmed). A small juniper bought from a supermarket in mid-December as a gift. It sits on a warm windowsill above a radiator in the west balcony apartment.
- Record: Tag: “INDOOR BONSAI · Juniper · Water twice a week · Bright indirect light · Keep away from drafts · Easy care” Source: A supermarket, in mid-December. Nobody knows where or how it was grown before the shop. Photos: Taken today from the front, back, and both sides, with close-ups of the foliage, trunk base, surface, and the pot's underside. Identity: The foliage looks like Juniperus procumbens 'Nana', a compact Japanese garden juniper, but nobody has confirmed it. Question: How do you record what it is?
- Foliage and stems: Foliage: Dense tufts of short, prickly, needle-like leaves, an even green all over. No brown or yellow patches. Shoot tips: Firm and green. No dead tips, and no new growth, which is normal for a juniper in winter. Stems: No wire or ties anywhere. Question: What does the foliage need from you today?
- Surface, pot, and drainage: Surface: Pebbles glued into a hard crust cover the whole surface. Water poured on top runs off to the edges. Pot: Glazed blue ceramic. Turned carefully on its side, its base has no drainage hole at all. Rim: A thin gap between the crust and the pot wall is the only way water gets in. Question: What does this container need?
- Root-zone moisture: Weight: Heavy for its size. Chopstick: Pushed down through the gap at the rim, it comes out dark and wet along its whole length. Tilt test: Tipped gently over the sink, water trickles out of the gap: water is standing in the bottom of the pot. Smell: Earthy, not sour. Question: Does it need water today?
- Pests and keeping it apart: Needle tufts: Checked inside and out with a hand lens: no fine webbing, speckled or bronzed needles, cottony patches, or bumps. Tap test: A branch tapped over white paper drops a few old brown needles and nothing that moves. Other plants: Two houseplants live in the living room. Question: Nothing found today. What now?
- Weather and placement: Forecast: Hard frosts for the next several nights, down to about −9 °C (16 °F), then a milder spell after Christmas with nights near freezing. Cold readiness: Weeks in a heated shop and home mean it is not cold-acclimated. Places: The warm sill above the radiator, a cool bedroom with a bright window and its radiator off, and the west balcony. Question: Where should it spend the next few nights?
- First actions: Foliage and pests: Healthy-looking so far; nothing found on the first check. Container: A glued crust, no drainage hole, and water standing in the bottom. Placement: A warm sill above a radiator, with hard frosts outside. Identity: A good guess, not yet confirmed. Question: Which plan fits its first few days?
- When to check again: Coming up: A milder spell after Christmas. The owner is home for the holidays, then away for a week of work travel in January. Help: A friend can water while the owner travels, if shown how. Question: When do you look at it again?
Trident maple, mid-April (Acer buergerianum). Bought in leaf in mid-April from a local nursery that grows its trees outdoors, and set down on the patio of the small backyard.
- Record: Label: “Acer buergerianum · Trident maple,” the nursery's printed label. Source: Asked at the till: the nursery grew it outdoors, in the open, all year. Photos: Front, back, both sides, and close-ups of the leaves, trunk base, surface, and the pot's underside. Question: Why note that it grew outdoors at a local nursery?
- Foliage and stems: Leaves: Just opened: soft, pale green, three-lobed, in opposite pairs. Two low leaves have small, ragged holes. Stems: A bamboo cane is tied to the sturdy young trunk with a plastic tie, and the tie is pressing into the bark. Buds: Opened evenly all over. No dead branch tips. Question: What about the tie?
- Surface, pot, and drainage: Pot: A black plastic nursery pot with several drainage holes. Water poured on soaks in and runs out below. Surface: A few small weeds, a patch of moss, and round fertilizer pellets from the nursery in the mix. Underneath: A few white root tips at the drainage holes. Question: What does the container need?
- Root-zone moisture: Weight: Light for its size. Chopstick: Pushed in partway between trunk and rim, it comes out dry and clean, with only the tip slightly damp. Leaves: A few at the top hang limp in the afternoon sun and wind. Question: Water it today?
- Pests and keeping it apart: Under the pot: A slug, and silvery slime trails on the pot's base. Leaves: Two low leaves have ragged holes. Under a hand lens, the undersides and shoot tips are otherwise clean. Other plants: Two other bonsai sit on a bench by the fence. Question: What do you do about it?
- Weather and placement: Forecast: Clear and still tonight, down to about −2 °C (28 °F), with frost likely. Milder nights from tomorrow. Leaves: Soft and newly opened. The yard: The southeast corner is the lowest spot, where cold air settles on still, clear nights. The unheated garage has a window. Question: Where does it spend tonight?
- First actions: Root zone: Dry, with limp leaves at the top. Stems: A tie pressing into the bark. Surface and pests: Weeds, fertilizer pellets, one slug, and two chewed leaves. Weather: Frost likely tonight. Question: Which plan fits its first few days?
- When to check again: Tonight: In the garage, with frost outside. Coming up: Milder nights and sunny, breezy days. The last frost usually comes in late April. Question: When is the next check?
Ficus, October (Ficus microcarpa). Bought in October from a shop that grows its plants in a heated greenhouse, and carried home to the bright window apartment.
- Record: Tag: “Ficus microcarpa,” with no care notes. Source: The shop grows its ficus in a heated greenhouse: warm, humid, and bright all year. Home: The bright window apartment, which has a few other houseplants. Question: Which photos go in the record?
- Foliage and stems: Leaves: Glossy, oval, dark green, and alternate along the stems. Most look clean. Lower leaves: A few feel sticky and look extra shiny in patches. Shoot tips: Fresh and pale green at the top. Question: What do the sticky leaves tell you?
- Surface, pot, and drainage: Pots: A plastic growing pot with drainage holes, sitting inside a glazed decorative outer pot that has no hole. Inside: Lifting the inner pot out, a pool of water stands in the bottom of the outer pot. Surface: Loose decorative gravel over the potting mix. It lifts away easily. Question: What do the pots need?
- Root-zone moisture: Weight: Moderate for its size. Chopstick: Dry for the top 2 cm (about 1 in), then cool and damp below that. Surface: The gravel looks dry. Question: Water it today?
- Pests and keeping it apart: Stems: Under a hand lens, small brown, dome-shaped bumps along two stems near the sticky leaves. They scrape off with a fingernail. Undersides: A few bumps along the midribs. No webbing or cottony patches. Other plants: A pothos sits at the other end of the same sill. Question: What now?
- Weather and placement: Outside: October nights are cooling toward frost; the first autumn frost usually comes in mid-October. The window: South-facing. On clear October days, direct sun reaches the sill from late morning to mid-afternoon. The room stays 20 to 22 °C (68 to 72 °F). Came from: A bright, humid greenhouse with more light than any window. Question: Where should it live for now?
- First actions: Leaves and stems: Sticky patches, and brown bumps that scrape off. Container: Water pooled in the outer pot. Root zone: Damp below the surface. Light: Less than the greenhouse gave it. Question: Which plan fits its first few days?
- When to check again: Coming up: Shorter, darker days, and the heating starting soon. Owner: Works from home and rarely travels. Question: When do you look again?
When all eight steps of a case are answered, an arrival record appears. It lists the case facts, each of your answers marked right or reconsider (with the better answer for any to reconsider), what was done first, what is still to find out, what is deferred, and when to check again.
The pattern was different for each tree. The trident maple, grown outdoors nearby, needed no slow start in the light, but it needed water, its tie snipped, a slug removed, and one night in the unheated garage; only its draining pot was left alone. The ficus was almost the reverse: no water yet, because it was damp below its dry-looking gravel, but the brightest place on the sill, an emptied outer pot, and a closer look at sticky leaves and bumps typical of scale insects, not yet confirmed. Across all three, feeding, repotting, and spraying were never right on arrival, and every plan turned on two facts you could not see on the tree: where it had grown, and the season and weather it arrived into.
The first-week plan
The bonsai decision
A first-week plan for a new tree
Starting point
On arrival day, make an arrival record with photos and inspect the tree before changing anything. Then:
- Water only if the root-zone check shows it needs it, thoroughly, and let it drain.
- Fix what cannot wait: standing water or a pot that cannot drain, a tie cutting in, a pest you can remove by hand.
- Place it for where it grew and for this week's weather, apart from your other plants.
- Hold off on repotting, pruning, wiring, styling, and fertilizing until it has settled and you know what it is.
Check it tomorrow, in about a week, every few days for pests over the first few weeks, and in about a month. After several clean checks and normal growth for its kind and season, it joins your other plants.
This assumes
The tree looks basically healthy on arrival. You know, or are finding out, at least whether it is temperate or tropical. You have a place that suits it in this season, a spot where it can stand apart, and a way to check the forecast. The timings are a starting point for the course's example climate, not a calendar to follow whatever the tree does.
Change course if
- The root zone smells sour, stays soggy for days, or the tree wilts while the pot is wet. The drainage fix becomes urgent. Do not water, and ask an experienced grower to help you look at the roots (Course 07, Tree Health and Diagnosis).
- The root ball is bone dry and has shrunk from the pot wall. Water poured on top may run straight down the gap. Water slowly in several passes, or stand the pot in water until the root ball is wet through, then let it drain (Course 03, Watering and Daily Observation).
- The forecast changes: frost, a heat wave, or strong wind. Shelter comes first: a cool, frost-free place overnight, bright shade with the pot shaded, or a secured pot in a sheltered spot.
- A sign of pests turns up or spreads. Keep the tree apart longer, photograph the sign, check your other plants, and confirm what it is before treating (Course 07).
- Nobody can confirm what it is. Place it by the most you can say with confidence while you get help (Lesson 2). A tree that is clearly temperate, such as any juniper, goes somewhere cool, bright, and frost-free, not a warm room. One that might be tropical stays bright, away from heaters, and above about 10 °C (50 °F) for the week or two it takes to find out.
Back to the question
What should you do in a new tree's first hour, first week, and first month?
In the first hour, record and inspect before changing anything, then act only on what cannot wait: water if the root zone needs it, fix standing water or a pot that cannot drain, remove a tie cutting into the bark, and place the tree for where it grew and for tonight's weather, apart from your other plants. In the first week, check moisture as conditions demand, finish urgent corrections such as slip-potting, follow the forecast, and find out what the tree is. Through the first month, keep checking for pests, and watch for normal growth and a root zone that dries steadily. Repotting, styling, and feeding wait until the tree has settled and you know what it is.
Key takeaways
- A move is already a stress, so a new tree's first weeks aim to remove urgent problems, add no elective ones, and learn what you have.
- Start an arrival record before changing anything: source, price, tag, identity and how sure you are, where it was grown, what you found, and photos from every side.
- Inspect from the top down, under the pot, and in the root zone. Signs such as webbing, honeydew, and bumps tell you where to look closer; they are not diagnoses.
- Act now on what cannot wait (water, drainage, frost, ties cutting in), find out what is still unknown, and hold off on repotting, styling, and fertilizing.
- Plan the next checks: tomorrow, in about a week, every few days for pests while it is kept apart, and in about a month for signs that it has settled.
Optional · not required for completion
Make an arrival record
Give a tree or houseplant you already have an arrival record, as if it came home today. Copy any tag word for word, note what you know about where it was grown, and take the full photo set. Then inspect it with a sheet of white paper and, if you have one, a hand lens. What did you find that you had never noticed? Which findings would be Act now, Find out more, or Hold off?
No tree? At a garden center or a supermarket plant shelf, inspect one tree without buying it, and leave it as you found it. Copy its tag, look under its leaves and at its surface and pot, and ask the staff where it was grown. Then write its first-week plan as if you had taken it home.
Go deeper · optional, not assessedWhy sap feeders leave honeydew
Aphids, soft scale insects, mealybugs, and whiteflies feed by piercing the phloemThe living tissue that carries dissolved sugars and other compounds from where they are made or stored to where they are needed, such as roots, shoot tips, and storage tissues. In trunks and branches it forms the inner bark, and its flow can run upward or downward.Open the glossary, the tissue that carries sugars through the tree (Course 01, Lesson 9). Phloem sap is under pressure, which helps push it into the insect, and it is rich in sugar but poor in the amino acids the insect needs to grow. To get enough of those, the insect takes in far more sap than it can use and passes much of the extra sugar out as honeydew. Pests that feed on the contents of individual plant cells instead leave none: spider mites, which are not insects at all, leave pale speckles, and armored scales, a group of scale insects that also feeds on cell contents, leave no honeydew either.
This lesson completes Choosing a Tree and Creating Its Growing Environment: a place read before a purchase, a tree identified and matched to it, a healthy start chosen, and a first month planned. Quiz 2 brings the whole course together in a final case. After it, Course 03, Watering and Daily Observation, now being prepared, will turn tomorrow's chopstick check into a routine.